
|
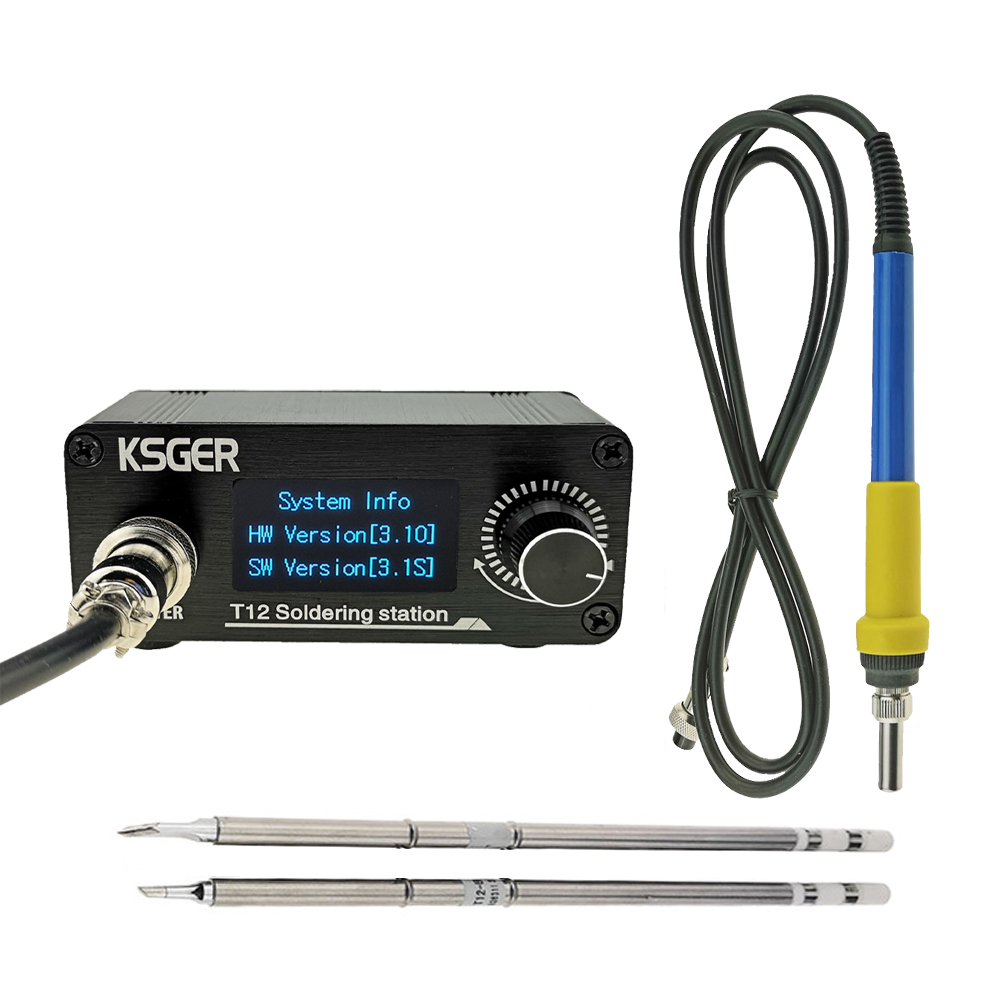
This soldering station works with Hakko's well-known T12 soldering tips and an SM32 microcontroller that controls the temperature of the soldering tip with a PID algorithm. |
Introduction to the KSGER T12/STM32 soldering station
Available as a kit or as a complete unit
You can buy this KSGER soldering station either ready-to-use or as a kit. Moreover, various versions are available, e.g. for power supply with 230 Vac or with 24 Vdc. In the first case, a power supply PCB from 230 Vac to 24 Vdc is built into the device.
The specifications of the T12/STM32 soldering system
All versions available have, broadly speaking, identical specifications:
- Power supply: 230 Vac or 24 Vdc maximum
- Power: 75 W maximum
- Soldering tip temperature: 150 °C ~ 480 °C
- Start-up time: 5 seconds
- Temperature control algorithm: PID (proportional, integral, differential)
- Temperature stability at rest: ±2 °C
- Standby: yes, adjustable time
- Auto Power Off: yes, adjustable time
- Boost function: yes, adjustable temperature
- Temperature profile: storage for all standard T12 soldering tips
A complete T12/STM32 station as a kit
You can buy a complete kit of a T12/STM32 soldering station for about € 55.00 ar AliExpress. This KSGER kit comes with two soldering tips, a sturdy handle, an assembled 230 Vac to 24 Vdc power supply PCB, an assembled SMT32 controller PCB and an aluminium or plastic housing. Due to earthing problems of the aluminium enclosures, we recommend plastic enclosures!
 |
| A DIY kit from KSGER. (© AliExpress) |
A cheap off-the-shelf T12 soldering station
The cheapest station we could find costs just € 23.21 and is offered via AliExpress by the 'Handskit Store'. The kit consists of a plastic handle, one type-K soldering tip and a plastic enclosure with a simpler controller board, but without a power supply. You can connect this plastic case via a standard power connector to a 24 V stabilised power supply that should be able to deliver 72 W.
 |
| An inexpensive T12 soldering station without a power supply. (© AliExpress) |
The one we purchased
We ordered via AliExpress a fully assembled T12 soldering station for 230 V power supply in a plastic case, with an FX9501 handle and with shape-K and shape-I soldering tips. We paid € 72.75 for it, including shipping.
Note that all KSGER stations come WITHOUT mains cable. You need to buy a mains cable with a standard IEC C13 female connector.
 |
| The soldering station we bought. (© AliExpress) |
The T12 soldering tips from Hakko
More than enough choice!
KSGER's soldering stations are designed for use with the well-known T12 tips from Japanese company Hakko. These T12 tips have become a de facto standard that you can use in a lot of soldering stations. The tips are about 155 mm long and have a diameter of 5.0 mm. Because of their popularity, there are obviously several Chinese manufacturers making clones of the Hakko's.
The complete KSGER stations you can buy are not by definition supplied with the most useful tips. But there are more than eighty differently shaped T12 pins on the market, making it easy to add the right one to your order.

Fast heating and good temperature control
The two main features of the T12 soldering tips are that they heat up very quickly and maintain this temperature quite accurately during soldering. This has everything to do with the technology of the soldering tips. The figure below shows a cross-section through such a tip. The tip is hollow and has three contacts: plus, minus and earth (E). The heating element is close to the the tip of the soldering iron and consists of a number of windings of heating wire with a resistance of about 8 Ω on a ceramic support. In series with this element, a thermocouple is included as close to the tip as possible. This couple generates a very small DC voltage that is directly proportional to the temperature of the tip. Since the resistance of a thermocouple is virtually zero, this series connection has no adverse effect on the heating of the soldering tip.
 |
| The cross section of a T12 soldering tip. (© 2022 Jos Verstraten) |
Principle of the temperature control
The controller board contains hardware and software that both deliver the supply voltage to the heating element and measures the voltage of the thermocouple. And this via two wires! The chosen method is quite simple and represented in the figure below. The power supplied to the pin is of course controlled by using pulse width modulation. Thus, in the left position of the electronic switch, the supply voltage is fed to the heating coil. In the other position of the switch, the voltage generated by the thermocouple is measured.
According to KSGER's data, temperature control works according to a PID algorithm. These letters stand for 'Proportional, Integrating, Derivative'. In short, the system tries to make the temperature of the pin equal to the set value as quickly as possible. If the temperature of the pin suddenly drops sharply, the PID controller will send a lot of extra power to the heating element. As the difference between the measured and set temperature becomes smaller, the controller will offer less and less extra power to the pin. In this way, the controller is prevented from 'overshooting' and overheating the pin.
In the memory of the controller board, each available soldering tip has its own profile that ensures that the tip reaches the desired temperature as quickly as possible and with as little overshoot as possible. Hence the software has an option to select the soldering tip used.
The classification of T12 soldering tips
As already written, Hakko has designed more than eighty different types of tips according to the T12 specifications. To still keep some overview, they have divided them into nine categories. In each category there are several specimens with various thicknesses and widths.
 |
| The principle of temperature control. (© 2022 Jos Verstraten) |
According to KSGER's data, temperature control works according to a PID algorithm. These letters stand for 'Proportional, Integrating, Derivative'. In short, the system tries to make the temperature of the pin equal to the set value as quickly as possible. If the temperature of the pin suddenly drops sharply, the PID controller will send a lot of extra power to the heating element. As the difference between the measured and set temperature becomes smaller, the controller will offer less and less extra power to the pin. In this way, the controller is prevented from 'overshooting' and overheating the pin.
In the memory of the controller board, each available soldering tip has its own profile that ensures that the tip reaches the desired temperature as quickly as possible and with as little overshoot as possible. Hence the software has an option to select the soldering tip used.
The classification of T12 soldering tips
As already written, Hakko has designed more than eighty different types of tips according to the T12 specifications. To still keep some overview, they have divided them into nine categories. In each category there are several specimens with various thicknesses and widths.
 |
| Hakko's nine categories of T12 soldering tips. (© Hakko) |
Special desoldering versions
Besides these 'normal' soldering tips, Hakko has also developed a number of special ranges for desoldering SMD components. These tips are disproportionately expensive. For a T12-1403 you pay € 64.58 at the 'Hakko E-shop'.
 |
| Special T12 soldering tips for desoldering SMD components. (© 2022 Jos Verstraten) |
The soldering station we bought
The soldering station
The electronics are contained in a black plastic housing with dimensions of 95 mm width by 45 mm height by 157 mm depth. Its weight is only 325 grams. On the underside are four small rubber feet, but despite these friction-causing parts, you cannot press the encoder button with one hand. The box will then move across the table. So you must always operate the station with two hands, one for holding the case and the second for operating the rotary and push button.
The front panel contains nothing more than the five-pole connector for connecting the soldering iron, the display and the push and turn encoder-knob with which you can programme and operate the station.
The display measures 17 mm by 29 mm and, contrary to what some reviews claim, is excellent to read. The connector is a sturdy screw connector with thick pins that will not bend easily if you plug and unplug the soldering iron connector often.
 |
The housing of the soldering station. (© AliExpress) |
The back of the enclosure
The back looks equally professional and contains a toggle switch that switches the mains voltage, an IEC C13 male connector and a cover behind which a fuse is located.
 |
| The back of the enclosure. (© 2022 Jos Verstraten) |
The electronics inside the enclosure
After removing eight small screws, you can separate the two parts that make up the enclosure and see what is hidden inside. Or something close to what is inside the T12/SMT32 soldering station we purchased! Because from all the pictures of the inside, which can be quickly found via Google, it appears that various versions of the power supply PCB have been developed and put into production over time.
In any case, the quality of our PCB is excellent. One point of criticism is that under one of the two heatsinks a track runs across the PCB. This heatsink 'floats' only a few millimetres above the PCB. In an extreme case, the heatsink could therefore make contact with this track with unknown consequences. In practice, however, this chance is extremely small and, moreover, the PCB is covered with an insulating solder mask.
Note that there is a fuse in the circuit, but for cost reasons it is not in a fuse holder, but soldered on the PCB. Too bad!
Some reviewers complain that the 'creepage distance' in the 230 V section of some versions of the PCB does not meet today's requirements for the minimum distance between two 230 V tracks. According to our data, the minimum creepage distance for a peak voltage of 325 V and for a soldermask coated PCB is 0.8 mm. In our opinion, the PCB meets this requirement.
The small SMT32 PCB is rather clumsy mounted inside the enclosure. This PCB is fixed exclusively with the one nut of the encoder. Hence, in the above photo, this PCB is not mounted neatly parallel to the front panel, but slightly at an angle. The display PCB is pressed against the back of the front panel.
In our specimen, the five solderings on the connector have been coated with a thick blob of insulation paste and can therefore never be unsoldered if, for example, you should need to replace a defective connector with a new one.
 |
| The electronics inside the enclosure. (© Banggood) |
The supplied soldering iron handle
Our sample came with an FX9501 handle. You simply push the soldering tip into this handle, no need to screw or tighten anything. Together with this tip, this handle weighs just 41 grams! So you get an excellent-handling soldering iron that is pleasant to work with. A contributing factor is the highly flexible silicone cable with a diameter of only 4 mm and a length of 1 m. This cable ends in a female GX12 connector with five poles. Such a silicone cable is highly resistant to high temperatures, so the chance of accidentally burning through the cable with the tip of the soldering iron is extremely low.
 |
| The FX9501 soldering iron handle supplied by KSGER. (© 2022 Jos Verstraten) |
A motion sensor and a thermistor
The cable has a connector with five contacts. The soldering tip itself has only three contacts. So what are those two remaining contacts used for? The handle supplied by KSGER contains a NTC-resistor and a motion sensor. That NTC-resistor measures the temperature of the handle at the place where you hold it. You can show this temperature in the display if you wish. A, in our humble opinion, rather superfluous extra!
More convenient is the motion sensor. Thanks to the signal from this component, the software detects that you have not used the soldering iron for an adjustable amount of time and puts the station into 'Standby' or 'Sleep' mode. The temperature of the tip is then automatically reduced. If the sensor reports that you are taking the soldering iron in hand again, the PID control ensures that the tip is back to the set soldering temperature after about ten seconds. By the way, that motion sensor is nothing more than a simple mercury switch (prohibited in the EU!) that opens or closes when you hold the soldering iron in your hand at a certain angle to the horizon.
The image below shows where these two components are located in the FX9501 handle and the wiring to the GX12-5 connector.
 |
| The wiring in the KSGER soldering iron handle. (© 2022 Jos Verstraten) |
Working with the KSGER T12 soldering station
Introduction
As with many excellent Chinese electronics products, the KSGER T12 soldering station does not come with a proper English-language manual. A great pity! That is why in this article we extensively discuss all the possibilities offered by the extensive software of this soldering station.
Starting up
Our soldering station works with hardware and software versions 2.00 and 2.09 respectively. After operating the ON/OFF switch on the back of the housing, nothing at all happens for five seconds. Just when you think the device is faulty, the image below appears on the display.
'SET' shows the desired temperature you set last time, the device remembers this setting. '11%' shows the duty-cycle of the pulse-width modulated supply voltage of the soldering tip. In larger figures, of course, the current temperature of the soldering tip is displayed. In addition, the time, very useful in case your wristwatch is faulty. The indication 'ILS' shows which soldering tip you have selected. The '(0)' indicates that this tip has not been calibrated (read on). Finally, '24°C' indicates the current temperature of the handle.
 |
| What appears on the display after start-up. (© 2017 Alexander Drozdov) |
Quickly setting a different temperature
Briefly press the encoder button, the image below appears on the display. You can then, by turning the button, set a different temperature. Confirm this setting by pressing the button again. The [G1] indication tells you that you are storing this temperature in the first memory location. In fact, you can store five temperatures in the microcontroller's memory. You select these five temperatures by pressing and turning the button at the same time. You will then see [G1] to [G5] appear with the assigned values.
") |
| Setting the desired temperature. (© 2017 Alexander Drozdov) |
Giving a quick boost
Sometimes it is necessary to have extra thermal energy available for soldering something larger, such as the mounting lug of a connector. Turning the button quickly clockwise activates the soldering station's 'Booster' option. The temperature of the tip is then quickly increased by the booster value, set once in the 'Setup Menu' (read on). Ready? Then press the button briefly and the normal temperature is restored.
Quick to 'Sleep' mode
Need to briefly interrupt your soldering to answer a phone call? Then quickly turn the button anticlockwise and the soldering station goes to the 'Sleep' temperature. You also programme this value once via the 'Setup Menu'. Soldering again? Press the button briefly and the normal temperature is restored.
Selecting another soldering tip with 'Tip Select'
You can pull the tip out of the handle with a pair of pliers and replace it with another one. However, you must report this action to the station, as each soldering tip seems to have a different heating algorithm in the software. You can select which soldering tips you possess in the 'Setup Menu', so you don't have to search the entire list each time. Press the encoder button and at the same time turn at least three clicks clockwise. You will see the information below appear on the screen. Turn the button until you see the new solder tip appear and press the button to confirm.
 |
| Selecting the soldering tip used. (© 2017 Alexander Drozdov) |
Calibrating the soldering tip with 'Tip Adjust'
This option becomes active when you press the encoder button and at the same time turn it counter-clockwise at least three clicks. 'Tip Adjust' allows you to calibrate the temperature readings of your soldering station and a particular tip. However, this option only makes sense if you have a measuring instrument with which you can accurately measure the temperature of the tip. The screen shown below on the left appears on the display. If you press 'Start', the software starts a routine that sets the temperature of the tip successively to (approximately) 450 °C, 350 °C and 250 °C. The picture on the right shows the screen that appears on the display after clicking 'Start'. At 'Adj Point' it indicates the temperature that the software will set. 'Cur Tmp' shows the temperature your soldering station is measuring. At 'Real Tmp' you can enter what your external accurate meter thinks of the tip temperature.
After a button click, the procedure is repeated for 350 °C and 250 °C. Another button click will exit the 'Tip Adjust' option. The three exact temperatures you entered are now processed by the software into the station's measurement results. After calibration of the specific soldering tip, the indication of the type of tip at the bottom left of the display, changes from 'TIPCODE(0)' to 'TIPCODE(*)'.
 |
| Calibrating the temperature of the soldering tip. (© 2017 Alexander Drozdov) |
The 'Setup Menu' of the KSGER T12 soldering station
Nineteen options!
You enter the 'Setup Menu' by pressing the encoder button for at least three seconds. This menu has no less than nineteen options that you can select by turning the encoder button. You activate one of those options by briefly pressing the button. A new screen will then appear on the display where you can set one or more parameters by turning the button. When you have finished changing settings and want to go back to the 'Setup Menu', press the button for more than three seconds. Pressing the button again for three seconds will exit 'Setup Menu' and the display will show the opening screen again.
 |
| The 'Setup Menu' option. (© 2017 Alexander Drozdov) |
01 - Standby
This option determines how the soldering iron enters 'Standby' mode, namely by:
- [SHAKE], by briefly shaking the soldering iron.
- [SWITCH], by pressing a button on the soldering iron (if applicable).
- [AUTO], automatically after a certain time has elapsed.
- [MANUAL], by momentarily turning the encoder button clockwise.
In 'Time' you can enter the time in minutes that must elapse before the soldering iron switches to 'Standby'. In 'Temp', enter the temperature the soldering tip will receive in 'Standby' mode.
02 - Sleep
You set the time after which the soldering iron enters 'Sleep' mode. The temperature of the tip is automatically reduced to the value you set. You can set a time between 1 and 60 minutes.
03 - Boost
In this screen, you can set the temperature increase of the 'Boost' mode of the soldering iron and how long the iron stays in this mode. The maximum values are 100 °C and 30 minutes.
04 - Cold End Adj
This option allows you to enter a temperature correction for the temperature measured by the NTC in the handle of the soldering iron or the temperature of the processor chip on the PCB.
05 - Tip Enable
This option allows you to enter which soldering tips you have in stock. You will see in various screens a lot of codes of tips that you can select or deselect. Only the selected tips will appear in the 'Tip Select' option already discussed.
06 - Stepping
Here you can specify the step value by which to increase or decrease the temperature of the tip. Can be set from 1 °C to 50 °C.
07- Password Setup
Allows you to enter a four-digit code that you can use to lock your soldering station from unauthorised use. At [LockTime], you can set the idle time in minutes after which your station will automatically lock itself. This time is adjustable between 1 and 60 minutes. You then have to enter the password to reactivate the device. Fortunately, you can also disable this option.
08 - Screen Saver
Because the intensity of the pixels on some OLED displays decreases after long-time burning, you have the option to set a kind of pixel protection with this option. The image on the display will then move by a few pixels every second to the left or right or up or down. You can again set a time of inactivity after which this option takes effect.
09 - Buzzer Setup
Enable or disable the built-in buzzer.
10 - Voltage Display
Put the output voltage of the power supply in the bottom left corner of the display instead of the soldering tip code.
09 - Buzzer Setup
Enable or disable the built-in buzzer.
10 - Voltage Display
Put the output voltage of the power supply in the bottom left corner of the display instead of the soldering tip code.
11 - LowVol Protect
This option is useful if you use your soldering station powered from a power pack. This option ensures that this power pack never discharges too deeply. You can set two voltage thresholds:
- [AlarmVol], voltage at which an alarm is triggered.
- [Down Vol], voltage at which the soldering station switches off.
12 - Power On State
Selects in which mode your soldering station starts up:
- [Running]
- [Sleep]
- [Standby]
13 - Language
Selects the language in which the station communicates:
- [Chinese]
- [English]
14 - DateTime
You set the current date and time. You can put this data on the display if required.
15 - RTC Adjust
You can compensate for a daily deviation in the time indication between -60 seconds and +60 seconds.
16- RTC Init
Resets the settings of the internal clock.
17 - Sys Info
Displays the versions of the hardware and software.
18 - Init
Resets all settings to factory values.
19 - Exit
You leave the 'Setup Menu', the opening screen reappears on the display.
Test of the KSGER T12/STM32 soldering station
How we tested
Testing a soldering station basically means measuring and logging, under various real conditions, the temperature of the soldering tip. This is easier said than done! We drilled a 1.5 mm diameter hole in a T12-BC2 soldering tip just 5 mm from the tip. We then mounted a type-K thermocouple in that hole and taped the cable of this component to the handle of the soldering iron. Finally, we additionally filled the hole with some heat-conducting paste. This way, we are able to accurately measure and log the real temperature of the soldering tip.
For static temperature measurement, we use our digital temperature meter UT320A from UNI-T. For logging the temperature of the tip during soldering, we use our temperature logger EL-USB-TC from Lascar Electronics.
 |
| Measuring tip temperature with a thermocouple. (© 2022 Jos Verstraten) |
Measuring the grounding resistance of the tip
We connected the soldering station to a good power cable with a grounded plug and measured the resistance between the ground lug on this plug and the the soldering tip. We do this using the four-wire Kelvin method with our Fluke 8842A and our ET3255 from East Tester. We observe quite large differences between the measurement results, depending on the type of soldering tip in the handle and the way it is placed. Simply rotating the tip around in the handle for a moment is enough to vary the earth resistance by a factor of four. The way the Kelvin probe is placed on the soldering tip also greatly affects the measurement.
There is no point in publishing long tables of measurement results, we suffice with mentioning the two extremes measured:
- Lowest measured resistance: 0.447 Ω
- Highest measured resistance: 2.524 Ω
It should be noted that the connection between the earth on the GX12 connector on the front panel and the earth on the IEC C13 connector on the rear panel is not made via wiring, but via a track on the power supply PCB.
Temperature setting accuracy
We clamped the soldering iron in a miniature bench table vise, so that the tip with the thermocouple was stable and immobile in the air. We then set the temperature to various values between 150 °C and 400 °C and measured what our UT320A thought of it. The results are summarised in the table below.
Please note that these measurements are indicative. Our thermocouple and our UT320A obviously also have an error and this combination is not calibrated. The combined error may be as large, or maybe even larger, than the error of the KSGER T12/STM32 soldering station. But you can see from the table that the soldering station does at least give a good indication of the real temperature of the soldering tip.
 |
Checking the accuracy of the temperature setting. (© 2022 Jos Verstraten) |
Heating up to 350 °C
KSGER makes a point that the T12/STM32 soldering station heats up very quickly to the set temperature. We have checked this and our measurement results are summarised in the graph below. You can see that the soldering iron heats up from room temperature to 350 °C in about 30 seconds. Admittedly, this process takes longer than the manufacturer claims, but we can live well with this result.
Soldering a 16-pin dual-in-line IC
In the following experiment, we soldered all sixteen pads of a DIL-16 IC in quick succession and measured the extent to which the control system is able to maintain temperature. We reproduced the results of this measurement in a clear graph. Note that already after the first soldering, the temperature of the tip drops from 350 °C to about 300 °C, but is then kept constant at this temperature. After soldering the sixteen pads, it takes about five seconds until the temperature of the tip reaches the set 350 °C again.
A heavier soldering job in conclusion
Finally, we soldered a thick 2.5 mm² solid copper installation wire onto a fully copper-plated piece of PCB. We did not expect this job to succeed with the T12-BC2 soldering tip but, with some difficulty, it did. To avoid sticky conditions, the temperature was set to 400 °C.
 |
Heating time to 350 °C. (© 2022 Jos Verstraten) |
Soldering a 16-pin dual-in-line IC
In the following experiment, we soldered all sixteen pads of a DIL-16 IC in quick succession and measured the extent to which the control system is able to maintain temperature. We reproduced the results of this measurement in a clear graph. Note that already after the first soldering, the temperature of the tip drops from 350 °C to about 300 °C, but is then kept constant at this temperature. After soldering the sixteen pads, it takes about five seconds until the temperature of the tip reaches the set 350 °C again.
 |
| Temperature progression when soldering the 16 pads of an IC. (© 2022 Jos Verstraten) |
A heavier soldering job in conclusion
Finally, we soldered a thick 2.5 mm² solid copper installation wire onto a fully copper-plated piece of PCB. We did not expect this job to succeed with the T12-BC2 soldering tip but, with some difficulty, it did. To avoid sticky conditions, the temperature was set to 400 °C.
 |
Soldering a 2.5 mm² wire on a fully copper-plated PCB. (© 2022 Jos Verstraten) |
Our verdict on the KSGER T12/STM32 soldering station
In most cases, we sell the devices we buy for a review and/or test back for a bargain price so that we are able to buy new stuff for testing. We are not going to do that with this soldering station! We have been using this soldering station for about a year now and we have fallen quite a bit in love with it. We even bought a few extra soldering tips. All our soldering jobs are performed with this KSGER T12/STM32 soldering station and no other!
Apart from the redundancy of some of the data on the display and the uselessness of some of the menu options, we can think of few criticisms.

(Banggood sponsor ad)
KSGER T12/STM32 soldering station
KSGER T12/STM32 soldering station