|
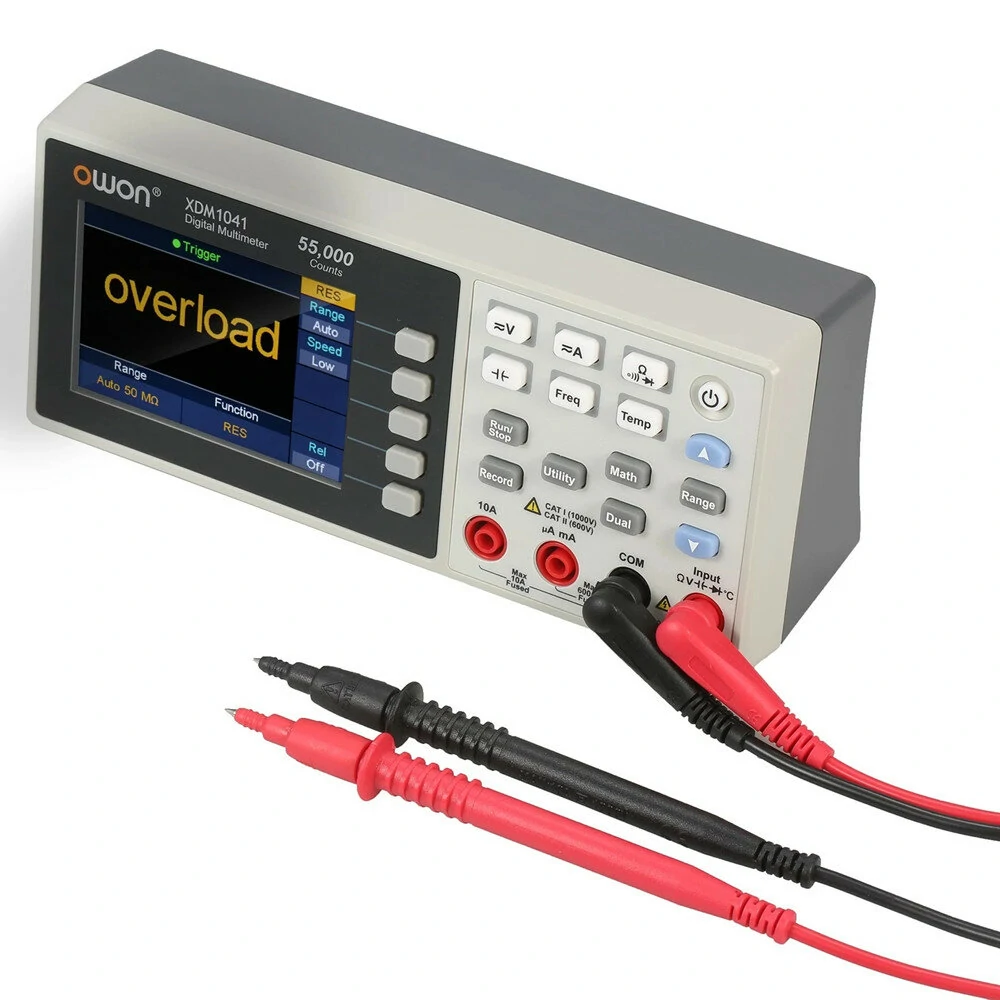
This small benchtop multimeter with mains power supply from OWON has a display of up to 55,000 counts and for DC voltage an accuracy of 0.05 %. It is offered at a price of approximately € 140.00. We ordered a specimen and carried out an extensive test. |
Introduction to the XDM1041 from OWON
Manufacturer, brand name and prices
The XDM1041 was developed by the Chinese company Fujian Lilliput Optoelectronics Technology Co. and marketed under the brand name OWON. In China, you can buy this multimeter at the well-known mail order companies for a price of around € 140.00. Very remarkable is that you can order the XDM1041 in the Netherlands at Eleshop for a very attractive price of € 129.00 including VAT, see Eleshop quotation of the XMD1041.
The scope of delivery
The multimeter is supplied in a sturdy cardboard box that contains:
- The XDM1041 digital multimeter with a display of up to 55,000 counts
- A black measuring lead of one metre in length
- A red measuring lead of one metre in length
- A sturdy power cord of 140 cm length with grounded power plug
- USB-B to USB-A cable of one meter in length
- Two sturdy insulated crocodile clips
- A spare 1 A fuse
- A 16-page 'Quick Guide' in the English language
Why a spare 1 A fuse is added but not a 10 A one is a mystery.
 |
| The scope of delivery of the XDM1041. (© AliExpress) |
The operating manual
The manual is not included, but you can find it on the Internet. For your convenience, we have uploaded this excellent 40-page manual to our private cloud, provided by Google Drive:
XDM1000 Series Digital Multimeter User Manual
The multimeter XDM1041
With its dimensions of 20.0 cm by 8.6 cm by 6.4 cm, the meter itself is rather small for a benchtop multimeter. With its weight of only 388 grams, it is also very light for such a device. The disadvantage is that the meter cannot be operated with one finger. If you press a button, the meter slides away, despite its rubber feet. You must therefore hold the housing firmly in order to be able to operate the buttons with one finger. Plugging in the test leads also requires two hands. Thanks to the special design of the housing, the front panel is at a slight angle and you can easily read the meter. However, in our opinion the inclination could have been slightly larger.
The rubber buttons are easy to operate and are placed far enough apart. The four 4 mm chassis are at the standard distances from each other, so that you can, for example, connect a thermocouple probe with standard connector to the meter without problems.
 |
| This picture shows how small the XDM1041 is. (© OWON) |
The XDM1041 seen from all sides
In the picture below, we have captured all views of this device with our camera. Especially the side view is worthwhile, because it shows the very special shape that the designers have given to the housing. On the back you will find a IEC C14 mains connector with built-in 1 A fuse and the standard USB-B connector for connecting the multimeter to your PC.
 |
| The XDM1041 seen from three sides. (© 2021 Jos Verstraten) |
The display of the XDM1041
The display of this multimeter is a TFT LCD with a resolution of 480 pixels by 320 pixels and the dimensions are 7.7 cm by 5.2 cm. Of course, it has a backlight that you can set via the 'Utility' menu to 0 %, 25 %, 50 %, 75 % and 100 %. On this screen a lot of information appears, see the figure below. Besides the primary measured value, you can also see a second value of the measured signal. In the example below, you can see the RMS value as well as the frequency of an AC voltage. The green indication 'Trigger' blinks shortly when the meter has taken a new measurement. At the right side of the screen there are five soft keys, with which you can set the specifications of the measurement.
 |
| The display with the five softkeys. (© 2021 Jos Verstraten) |
The most striking features of the XDM1041
This multimeter has the following functions:
- Measures DC voltages, AC voltages, DC currents, AC currents, resistors, capacitors, diodes, temperatures, frequencies and periods.
- Has mathematical functions that calculate the dB and dBm values of an AC voltage for reference resistors from 50 Ω to 8 kΩ.
- Can display the minimum, maximum and average value of a measurement cycle.
- Has a 'Record' function that allows you to store up to 1,000 measured values in memory.
- A measured value is stored in this memory after pressing the 'Save' button, but also automatically with a sampling time between 15 ms and 9,999.999 s.
- The meter has (of course) a 'REL' function that allows you to subtract the currently measured value from all subsequent measurements.
- The XDM1041 has a built-in clock and calendar chip that is powered by a battery and thus continues to run even if you unplug the power cord.
- For continuity measurements, you can set the resistance threshold at which the buzzer is activated between 0.1 Ω and 1,000 Ω.
The measurement ranges and accuracies of the XDM1041
According to the manufacturer, the meter has the following specifications:
- DC voltages:
50.000 mV ±(0.1 % + 10)
500.00 mV ±(0.05 % + 5)
5.0000 V ±(0.05 % + 5)
50.000 V ±(0.05 % + 5)
500.00 V ±(0.1 % + 5)
1000.0 V ±(0.1 % + 10)
- AC voltages:
500.00 mV ±(0.7 % + 30) @ 65 Hz ~ 1 kHz
5.0000 V ±(0.7 % + 30) @ 65 Hz ~ 1 kHz
50.000 V ±(0.7 % + 30) @ 65 Hz ~ 1 kHz
500.00 V ±(0.7 % + 30) @ 65 Hz ~ 1 kHz
750.00 V ±(0.7 % + 30) @ 65 Hz ~ 1 kHz
- DC currents:
500.00 μA ±(0.15 % + 20)
5.0000 mA ±(0.15 % + 10)
50.000 mA ±(0.15 % + 20)
500.00 mA ±(0.15 % + 10)
5.0000 A ±(0.5 % + 10)
10.000 A ±(0.5 % + 10)
- AC currents:
500.00 μA ±(0.5 % + 20)
5.0000 mA ±(0.5 % + 20)
50.000 mA ±(0.5 % + 20)
500.00 mA ±(0.5 % + 20)
5.0000 A ±(1.5 % + 20)
10.000 A ±(1.5 % + 20)
- Decibels:
Measuring dB and dBm in various resistors
- Resistors:
500.00 Ω ±(0.15 % + 10)
5.0000 kΩ ±(0.15 % + 5)
50.000 kΩ ±(0.15 % + 5)
500.00 kΩ ±(0.15 % + 5)
5.0000 MΩ ±(0.3 % + 5)
- Capacitors:
50.00 nF ±(2.5 % + 5)
500.0 nF ±(2.5 % + 5)
50.00 μF ±(2.5 % + 5)
500.0 μF ±(2.5 % + 5)
- Frequencies:
9.9999 Hz ±(0.2 % + 10)
99.999 Hz ±(0.2 % + 10)
999.99 Hz ±(0.2 % + 10)
9.999 kHz ±(0.2 % + 10)
99.999 kHz ±(0.2 % + 10)
999.99 kHz ±(0.2 % + 10)
9.9999 MHz ±(0.2 % + 10)
- Diodes:
3.0000 V ±(1.0 % + 10)
- Temperatures:
Measuring with K-type thermocouple or PT100 probe
The electronics in the XDM1041
Unscrewing the housing
The first thing that strikes you is a set of two fuses. These are normal glass fuses of 20 mm by 5 mm of 1 A and 10 A. The 10 A fuse does have a ceramic filling with flame-extinguishing material.
The second thing that strikes you is that the ON/OFF switch does not switch the 230 V mains voltage. The power supply board is always connected to the mains voltage and the switch therefore acts on the firmware and takes the processor and the entire device out of stand-by mode.
 |
The unscrewed multimeter. (© 2021 Jos Verstraten) |
The power supply board
This means that the device always draws a certain standby current from the mains. We have measured this current and it is equal to 0.2 mA, a value which does not make any difference to your energy meter. When the meter is switched on, the current rises to 45 mA, which corresponds to a consumption of only a little over 10 W. Because the photo below clearly shows that the power supply is a switched-mode type, we did not measure the primary current consumption with our modern digital meters, but with an old-fashioned analogue AVO meter, which, due to its own inertia, probably indicates the average value of the current better than the digital meters.
The picture below clearly shows that the power supply board always, even when the multimeter is switched off, provides 5 Vdc to the other boards. After all, connector J2 (top right), which goes to the PCBs containing the measurement circuitry, only has five pins, three of which go directly to connector J3 (bottom right).
That the designers have chosen for a switched-mode power supply without a primary mains switch is understandable from a cost point of view, but still we are not in favour of it. First of all, every switched-mode power supply generates a lot of HF interference on the mains and in the device itself. That is not nice in a circuit where you should be able to measure mV's of AC voltages. But secondly, a switched mode power supply that is always connected to the mains increases the chance that something in your house catches fire with one extra device.
 |
| The power supply board. (© 2021 Jos Verstraten) |
The PCB with the input circuits
The four 4 mm sockets are soldered directly to this board. The part under the black isolation is probably the 10 A current sensor, it is located between the COM and the 10 A fuse. Above this part is a bridge rectifier that protects the meter against a too high voltage on the current inputs relative to the COM. In such a case, the diodes will conduct and the fuses will blow immediately. The V/R socket goes directly to the protection circuit of four resistors R3, R10, R14 and R18 connected in series.
 |
The input PCB. (© 2021 Jos Verstraten) |
The processor board
The processor board shown in the photo below is screwed onto the fifth PCB on which the display and control buttons are mounted. On the PCB you can see a small battery that is probably used to keep the part of the circuit that remembers the date and time alive. The top side is completely taken up by the electronics that derives the necessary voltages for powering the measuring and display circuits from the 5 V voltage supplied through connector C01.
 |
| The processor board. (© 2021 Jos Verstraten) |
The XDM1041 in practice
Switching on the device
You must press the white button in the upper right corner of the multimeter for at least one second. You can release the button when you hear a relay switch. It takes about four seconds for the meter to start up and be ready for use. The meter will switch to the mode that allows you to measure DC voltages with automatic range switching in the 5.0000 Vdc range.
The speed of the automatic range switching
What strikes one most is that the meter is very slow in setting the correct measurement range. For example, if you first measure a small DC voltage in the mV range and then suddenly offer a voltage of 30 V, it takes up to five seconds for the meter to adapt to the new input value. The same applies if you first measure a small resistance and then a large one.
The standard measurements
With standard measurements, we mean those measurements that you perform with a multimeter in 95% of the cases: voltages, resistances, capacitors. If you take the slow response time for granted, working with the XDM1041 is a real pleasure. This is in the first place due to the large and beautiful display and the easy operation. The 'soft keys' on the right of the display can be operated quickly and easily thanks to the clear description of their functions. With the 'Range', '↑' and '↓' keys you can leave the auto-mode and quickly set the desired range by hand.
Setting a parameter
By a parameter we mean a certain value that you must enter, as for instance when setting the date and time or when determining the intervals between two measurements in the 'Auto-Record' function. This is also done with the 'Range', '↑' and '↓' keys. With the 'Range' you select one of the digits of the number, with the arrow-keys you increase or decrease the value of that digit.
Continuity Test
This function measures whether two points are connected in a low-resistance manner. This can be done with any multimeter, but with the XDM1041 you can set the 'short-circuit resistance' between 1 Ω and 1 kΩ. When the measured resistance is smaller than the set value, the meter will beep. The setting of this 'Threshold' can again be done with the three buttons already described.
 |
| Setting the short-circuit resistance. (© 2021 Jos Verstraten) |
Measuring temperatures
No temperature probe is supplied. You can connect a probe with a type-K thermocouple or with a Pt100 sensor. Of course you can choose between a reading in °C or °F. As with most multimeters, the question is how the cold junctions compensation is handled. We could not find any trace of a temperature sensor between the connection terminals, so the processor is probably calculating an average value, assuming an ambient temperature of 20 °C. Greater accuracy than plus or minus a degree or two should therefore not be expected from this function.
The Dual Display Function
This meter does not offer much. Only when measuring AC voltages or currents, you can see the frequency of the measuring signal as a second value in the display. So, when measuring capacitors, you cannot measure the ESR value as a second value.
Measuring dB and dBm
For both measurements you can select the reference resistance in 17 steps between 50 Ω and 8 kΩ. Conveniently, when measuring dB, you can also define a 'dB Rel' value. This way, you can quickly measure the gain in dB of an audio amplifier. You measure the input voltage in dB, set this value as the 'dB Rel' value and measure the dB value at the output of the stage. You will immediately see the gain of the stage on the display.
Please note, however, that when measuring AC voltages, the bandwidth is unfortunately too small to quickly measure the pass-band of an amplifier relative to 0 dB at 1 kHz in this convenient manner.
The 'Data Record' function
With this option, you can store up to one thousand measurements in the multimeter's memory. You can store a measurement after pressing 'Save' (Manual Record) or automatically after pressing 'Start' (Auto Record). In the latter case, you can set the interval between two measurements between 15 ms and 9,999.999 s. A table with three columns appears on the multimeter screen. The first one indicates the sample number, the second the measurement mode and the third the measured value.
There are, however, a number of remarks to be made about this handy function:
- One missed opportunity is that the date and time are not included in the table. These data could have replaced the rather superfluous 'MODE' column.
- In 'Auto Record' mode, the stored data does not appear on the screen in real time, but only after you stop recording by pressing the 'End' button.
- In 'Auto Record' mode, the table is automatically cleared when you start logging again by pressing 'Start'. Therefore, there is no possibility to pause the recording.
 |
The display in 'Data Record' function. (© 2021 Jos Verstraten) |
The XDM1041 on the test bench
Introduction
The tables below show the results of our measurements with the XDM1041 and one of our reference meters. We use the following as reference meters:
- For Vdc, Idc and resistances: Fluke 8842A
- For Vac and dBm: Easttester ET3255
- For capacitors: Easttester ET4401
For all measurements the reading on our reference meters is considered to be 100% and the percentage deviation of the reading of the XDM1041 compared to that 100% is calculated.
DC voltages
| MEASURED DC VOLTAGE |
READOUT FLUKE 8842A |
READOUT OWON XDM1041 |
PERCANTAGE ERROR |
|---|---|---|---|
| 10.0 mV | 10.064 mV | 10.068 mV | 0.04 % |
| 100.0 mV | 99.871 mV | 99.86 mV | 0.01 % |
| 1.00 V | 1.00023 V | 0.9998 V | 0.04 % |
| 10.00 V | 10.0058 V | 10.001 V | 0.05 % |
| 50.00 V | 50.010 V | 49.993 V | 0.03 % |
DC currents
| MEASURED DC CURRENT |
READOUT FLUKE 8842A |
READOUT OWON XDM1041 |
PERCANTAGE ERROR |
|---|---|---|---|
| 1.00 mA | 1.065 mA | 1.0608 mA | 0.39 % |
| 10.0 mA | 10.062 mA | 10.065 mA | 0.03 % |
| 100.0 mA | 101.249 mA | 101.18 mA | 0.07 % |
| 1.00 A | 0.99995 A | 0.9998 A | 0.02 % |
| 5.00 A | --- | 5.0023 A | --- |
Resistors
| MEASURED RESISTOR |
READOUT FLUKE 8842A |
READOUT OWON XDM1041 |
PERCANTAGE ERROR |
|---|---|---|---|
| 1.0 Ω | 0.9955 Ω | 0.96 Ω | 3.57 % |
| 10.0 Ω | 10.0421 Ω | 9.92 Ω | 1.22 % |
| 100.0 Ω | 100.032 Ω | 100.48 Ω | 0.45 % |
| 1.0 kΩ | 1.00008 kΩ | 1.0003 kΩ | 0.02 % |
| 10.0 kΩ | 9.9966 kΩ | 9.996 kΩ | --- |
| 100.0 kΩ | 100.087 kΩ | 100.08 kΩ | --- |
| 1.0 MΩ | 1.00169 MΩ | 1.0005 MΩ | 0.12 % |
| 10.0 MΩ | 10.4450 MΩ | 10.462 MΩ | 0.16 % |
For the Fluke, the four-wire method was used to measure the low values. For the OWON, the REL function was used.
Capacitors
| MEASURED CAPACITOR |
READOUT EASTTESTER ET4401 |
READOUT OWON XDM1041 |
PERCANTAGE ERROR |
|---|---|---|---|
| 100.0 pF | 100.341 pF | 00.00 pF | --- |
| 470.0 pF | 465.5 pF | 00.00 pF | --- |
| 1.0 nF | 0.9960 nF | 0.98 nF | 1.61 % |
| 10.0 nF | 9.955 nF | 9.98nF | 0.25 % |
| 100.0 nF | 100.37 nF | 99.9 nF | 0.47 % |
| 1.0 μF | 1.0077 μF | 1.002 μF | 0.57 % |
| 10 μF | 8.940 μF | 10.09 μF | 12.8 % |
| 100 μF | 92.53 μF | 97.7 μF | 5.5 % |
| 1.000 μF | 923.1 μF | 0.907 mF | 8.0 % |
At 100 pF and 470 pF, the XDM1041 did nothing at all. The display remained at zero. The measurements with the ET4401 are performed in four-wire technique. It takes an extremely long time before the XDM1041 gives a stable READOUT when measuring large electrolytics. For example, it takes more than ten seconds for a 1,000 μF capacitor!
AC voltages at 50 Hz
| MEASURED AC VOLTAGE |
READOUT EASTTESTER ET3255 |
READOUT OWON XDM1041 |
PERCANTAGE ERROR |
|---|---|---|---|
| 10 mVrms | 9.862 mVrms | 10.11 mVrms | 2.5 % |
| 50 mVrms | 50.424 mVrms | 50.10 mVrms | 0.64 % |
| 100 mVrms | 100.132 mVrms | 100.01 mVrms | 0.12 % |
| 1 Vrms | 1.00016 Vrms | 0.9997 Vrms | 0.05 % |
| 10 Vrms | 10.0432 Vrms | 10.032 Vrms | 0.11 % |
| 100 Vrms | 100.016 Vrms | 99.91 Vrms | 0.11 % |
| 270 Vrms | 270.08 Vrms | 269.33 Vrms | 0.28 % |
Frequency range AC voltage measurements
| FREQUENCY 1 Vrms SINEWAVE |
READOUT OWON XDM1041 |
PERCANTAGE ERROR |
|---|---|---|
| 10 Hz | 1.0015 Vrms | 0.0 % |
| 50 Hz | 1.0015 Vrms | --- |
| 100 Hz | 1.0014 Vrms | -0.01 % |
| 1 kHz | 1.0012 Vrms | -0.03 % |
| 5 kHz | 0.9691 Vrms | -3.2 % |
| 6 kHz | 0.9252 Vrms | -7.6 % |
| 7 kHz | 0.7451 Vrms | -25.6 % |
In this measurement, the readout at 50 Hz is taken as 100% reference. According to the specification, the -1 % bandwidth is 20 Hz to 1 kHz.
dBm measurements at 1 kHz in 600 Ω
| SETTING PHILIPS PM2454 |
READOUT EASTTESTER ET3255 |
READOUT OWON XDM1041 |
|---|---|---|
| +20 dBm | +20.20 dBm | +20.17 dBm |
| +10 dBm | +10.09 dBm | +10.08 dBm |
| 0 dBm | +0.03 dBm | +0.03 dBm |
| -10 dBm | -9.89 dBm | -9.89 dBm |
| -20 dBm | -19.93 dBm | -19.92 dBm |
| -30 dBm | -29.80 dBm | -90.00 dBm |
The input voltage was set to a Philips PM5109S sine wave generator and checked on a Philips PM2454 analogue dB meter. Why we did not enter a column with 'Percentage error' will be clear! The minimum value that the XDM1041 displays is -23 dB. At a lower input voltage, the meter goes to -90.00 dB.
Minimum voltage for stable frequency-readout
| SIGNAL FREQUENCY | MINIMUM VOLTAGE |
|---|---|
| 10 Hz | 460 mVrms |
| 100 Hz | 482 mVrms |
| 1 kHz | 602 mVrms |
| 10 kHz | 615 mVrms |
| 100 kHz | 648 mVrms |
| 1 MHz | 662 mVrms |
| 5 MHz | 780 mVrms |
Like all modern multimeters, the XDM1041 measures frequencies with absolute accuracy. We have tested up to 5 MHz, the maximum frequency of our generators. More interesting is how high the voltage must be to get a stable READOUT of the frequency. These data are summarised in the table above.
The software 'DMMEasyControl'
Introduction
The XDM1041 has a USB-B connector on the back with which you can connect the device to a USB port on your PC using the cable supplied. This only works if software is also available that controls communication between the multimeter and your PC. This software is called 'DMMEasyControl' and can be downloaded via XDM_PCsoftware.zip.
The purpose of this type of multimeter software is to allow you to operate the multimeter via your PC and to read out and display the measurement data stored in the device. At least, that is how it should be! But OWON's performance with this 'DMMEasyControl' is absolutely below expectation and the manufacturer should be ashamed of itself for offering such a piece of software with such a beautiful product.

The driver
It all starts with the necessary USB driver. Usually, this is a small piece of software that is easy to install and not too many MBs in size. The XDDM1041 uses the 'NI-VISA' platform, a system developed by National Instruments that allows devices to communicate with a PC. To be able to operate the XDM1041 via your PC, you must download and install this entire platform on your PC. No less than 656 MB with all kinds of things that are completely unnecessary if you only want to operate and/or read out your XDM1041 via your PC. Moreover, you have to disable the Windows firewall in order to get this programme fully installed. That is something we are not enthusiastic about.
 |
The opening screen when installing the NI-VISA software. |
The 'DMMEasyControl' software
Afterwards, you must install the XDM1041 software, which is done without any problems. We installed and tested version 1.6.1 on a Windows 7 Professional system.
Registering the XDM1041 in the software
When starting the software, it becomes clear that this program was not designed exclusively for the XDM1041. It contains a number of options that are not applicable to this device. The first thing you need to do is link the software to the device via the 'Control' menu and the 'Connect' option. This will usually result in the message 'DMMEasyControl not responding'. Only after several attempts did we finally get the 'Select Connection' window below on the screen. The device is connected to the PC via USB. The option 'Via USB' seems logical, but it is not. You have to select the option 'Via COM' and choose the COM-port to which the driver has connected the device. In our case that is 'ASRL8 (DMM)'.
 |
| Registering the XDM1041 in the software. (© 2021 Jos Verstraten) |
Controlling the XDM1041 via the software
It works, but a lot of details show that the software is anything but fully developed and that there are still a lot of bugs to be removed. For instance, the 'Math - Limits - Statistics' box often does not work at all. In the setting of measuring temperatures, the 'Units' are not given as '°C' but as 'iæ'. In the 'Math' function, it is not possible to select the dimension 'dB'. When selecting 'dBm' it is impossible to select the reference resistance, this remains set to 600 Ω. When using the 'Statistics' function, the display quickly switches between the actual and the average value, making it almost impossible to read.
In short, the software still needs a lot of work!
 |
| Operating the XDM1041 via the software. (© 2021 Jos Verstraten) |
Reading out the data from the 'Record' function
The most important application of multimeter software is reading and displaying the data collected in the memory of the multimeter using the 'Record' function. This is where the software fails completely. There is no possibility to show the measurement data clearly in a graph. The only thing you can do is convert the data stored in the meter's memory to an Excel table. But even that does not work. The software does create an .XLS file, but it cannot be read in Excel. Excel says 'The file you want to open does not have the format indicated by the file extension'. After opening this file anyway, a completely empty sheet appears. Only the first row shows 'NO MODE VALUE', the rest of the file is empty. This is confirmed when the file is opened in Notepad. No data to be found!
Our conclusion about the XDM1041 from OWON
If you carefully study the measurement data collected by us, you cannot but conclude that the device itself is a gem that fully meets the specifications and often even measures much more accurately than the manufacturer promises. Also in terms of appearance, readability and operation, we can find few points of criticism.
It is therefore a shame that this beautiful multimeter comes with software that is completely inadequate. But, software is easier to adjust than hardware! So let us hope that OWON will soon come up with a major upgrade of 'DMMEasyControl'. If that software gets an extension that makes it possible to extract the thousand measurement data in the hardware in a decent way and put them in a graph in a decent way, then we can recommend the XDM1041 without reservation to everyone who needs a versatile and affordable benchtop multimeter.

Owon XDM1041 USB Digital Multimeter 55000