|
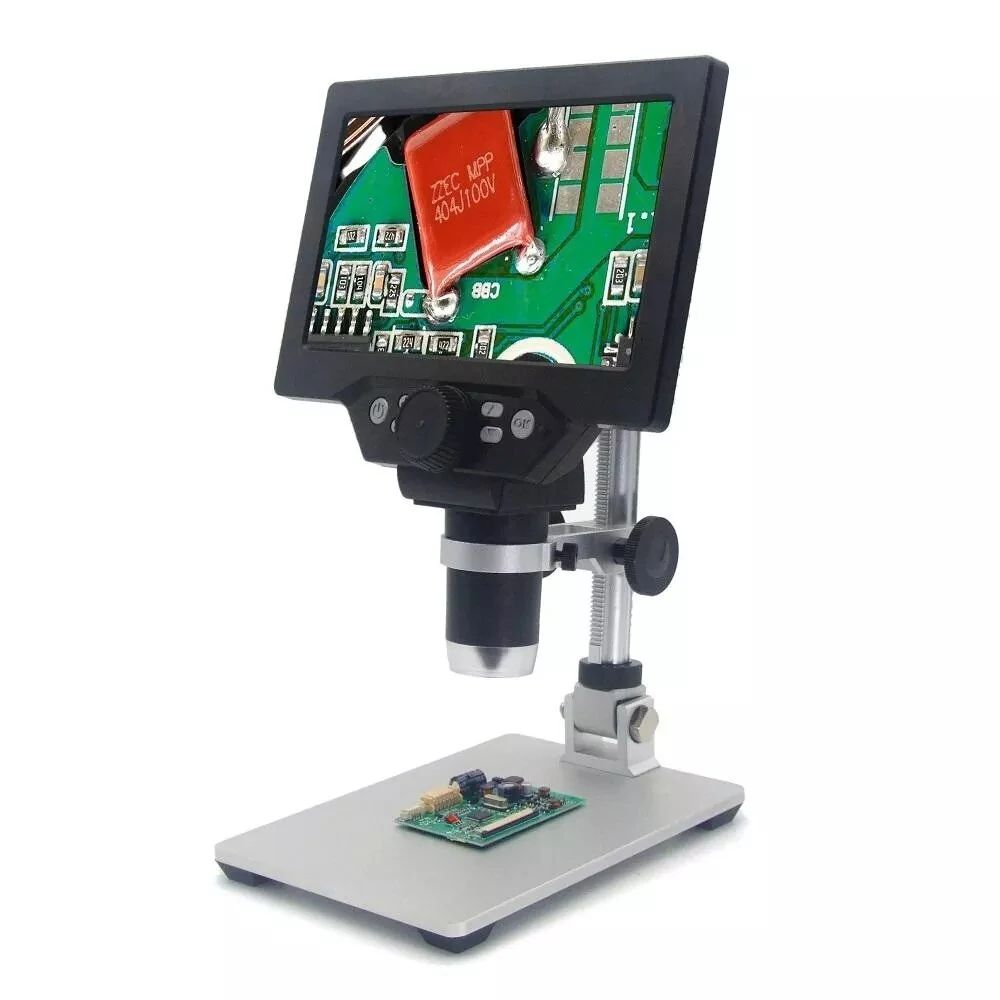
With its very large screen of 15.4 cm by 8.8 cm, its resolution of 1024 x 600 pixels and its tilting column, this digital microscope is ideal for soldering and inspecting SMD components. |
Introducing the G1200(D) from Mustool
What is the G1200 ~ G1200D?
This device is the successor to the G600 LCD microscope discussed elsewhere on this blog:
➡ G600 LCD microscope tested
The G1200(D) is characterized by a much larger display, a higher screen resolution and many more options in terms of image storage of both photos and videos. Of course, with this device you can also export the image on the screen to your PC via a USB connection.
 |
| The G1200 next to its predecessor G600. (© Alibaba) |
Tiltable column creates soldering space
A major improvement is that the column on which the microscope is mounted can tilt backwards, so that much more space is available for soldering a PCB on the base. Tilting also helps against reflections in the image and it is much easier to decipher the lasered texts on chips at a certain angle.
 |
| The tiltable column provides more working space between the lens and the base. (© 2022 Jos Verstraten) |
Manufacturer, versions, suppliers and prices
Although the cardboard box in which the G1200(D) is delivered does not contain any reference to a manufacturer, most suppliers mention the name 'Mustool'. However, the name 'SH-CHEN' also occurs sporadically. This microscope is apparently a popular product, because there are plenty of suppliers who are willing to supply you with the device for a price between about € 65.00 and about € 150.00. However, beware! Four different versions of the device are offered, so you should pay close attention to what a webshop offers:
- The microscope without extra lighting and without battery.
- The microscope with extra lighting and without battery.
- The microscope without extra lighting but with battery.
- The microscope with extra lighting and with battery.
Something has to do with the model number. That can be G1200, but also G1200D where D stands for extra options.
That extra lighting is definitely a handy and useful addition and you don't pay much more for it. If you buy a version with a built-in battery, you can use the actual microscope without a power adapter. However, you must always supply the additional lighting from a 5 V mains power supply via a USB-A cable. The usefulness of the built-in battery is therefore limited.
The G1200(D) is offered by Banggood, Amazon, eBay and a dozen shops via AliExpress. Especially with the providers on AliExpress, you should check very carefully which version is offered. We bought our device with extra illumination and with battery at Banggood for the price of € 83.57.
The packaging
The microscope is well packed in a sturdy cardboard box with the dimensions 25.0 x 20.5 x 8.0 cm³. This box is well cared for and suitable as gift packaging. Why we pay attention to such a detail as the cardboard box has to do with the nonsense printed on the box. The slogan '1-1200X', in large red letters, suggests that the G1200(D) magnifies a maximum of 1,200 times. Absolute nonsense, as will become apparent in the course of this article. The phrase 'Video High-expansion' sounds impressive, but the meaning is unclear. On the back of the packaging are six beautiful photos which, however, can never be made with this microscope. After all, the depth of field of a microscope is far too small for that! However, the same photos are used at a lot of web shops to promote the device. Not as it should be!
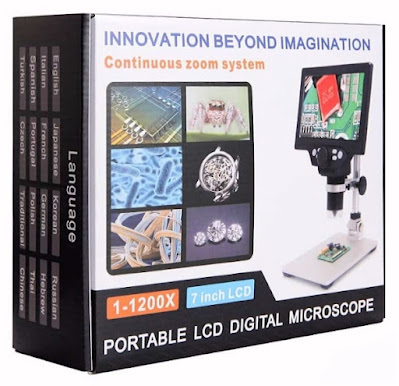 |
| The cardboard box in which the microscope is delivered contains a lot of nonsense. (© 2022 Jos Verstraten) |
The G1200(D) microscope
The first thing you notice when you open the cardboard box is the impressively large display with a diagonal of 7 inches. That is not saying much, more telling is the width of 15.4 cm and the height of 8.8 cm. The microscope is delivered disassembled in four parts, which are assembled after a few minutes. Except for the microscope itself, all parts of the construction are made of sturdy aluminum. The base of the device is even made of 5 mm thick aluminum and measures 12.0 cm by 16.5 cm. Four rubber feet ensure a stable and vibration-free setup. When you turn the microscope in the highest position, the total height of the device is 35.0 cm. The whole weighs a hefty 884 grams, a weight that contributes to the stable setup.
However, we have to make a comment on the mechanical stability. If you press one of the buttons, the construction of the microscope will move noticeably, causing the image to vibrate. Especially at a large magnification factor you will have a lot of trouble with this for a short while.
 |
| The G1200D looks very impressive. (© Banggood) |
The power supply and the battery
One mains adapter of 5.0 Vdc ~ 2.0 A and a cable with USB-A to micro-USB connectors are included. You can use this cable to power the G1200, to charge the battery (G1200D), to power the extra lighting and to export the images. If you have purchased a device with a built-in battery, you must first charge this battery with the cable and then use the power supply for the two extra gooseneck LED lights.
Our model contains a battery with a voltage of 3.7 V and a capacity of 3.0 Ah. The specifications claim that with a fully charged battery you can work with the microscope in photo mode for at least three hours. In video mode, you can work for at least an hour. With maximum lighting and in photo mode, the G1200 draws a current of 0.89 A from the 5 Vdc supply voltage. The additional LED's consumes a maximum of 0.15 A.

The manual
Inside the box is a small twelve-page brochure that looks more like an advertising leaflet than a manual. We scanned these twelve pages and turned them into a PDF, which you can download here if you wish:
➡ G1200D_Digital_Microscope_Manual.PDF
The memory
The back of the G1200 has a slot for inserting a MicroSD flash memory card with a capacity of up to 128 GB. The slot is in a not very convenient place, it requires quite a bit of fiddling to get the card into the device. You can record photos and videos on the card and play them back on the screen. Videos are recorded in MOV format and automatically numbered from VID_001.MOV. Photos are of course saved as .JPG and numbered from IMG_001.JPG. When the card is full, the oldest recordings are automatically deleted to make room for the new ones.
The light sources
Surrounding the lens of the G1200 is a ring-shaped array of eight white LEDs. A potentiometer on the back of the microscope allows you to control the intensity of this light source. The additional lighting consists of two gooseneck light sources, each with a powerful white LED. You can vary the intensity of this light sources with a similar potentiometer on the back of the base.
 |
| The LED array around the lens. (© AliExpress) |
The specifications
According to the manufacturer, the G1200(D) meets the following specifications:
- Screen resolution: 1024 x 600 pixel
- Screen dimensions: 7 inch diagonal (15.4 x 8.8 cm²)
- Resolution photos: 1.3 ~ 2 .0 ~ 5.0 ~ 8.0 ~ 10.0 ~ 12.0 megapixel
- Resolution videos: 1080 FHD ~ 720 P ~ VGA
- Magnification: x1 ~ x1200 smoothly adjustable
- Distance to object: 1.0 cm ~ 12.5 cm
- Storage: MicroSD flash card, 128 GB max.
- Power supply: 5.0 Vdc
- Battery: 3.7 V ~ 3 Ah ~ lithium
The electronics in the G1200(D)
Disassembly
There are nine small bolts on the back that clamp the two parts of the plastic housing together. After carefully removing the focus knob, you can separate the two parts of the housing, undoubtedly leaving the six buttons on your work table. Nice job putting everything back together afterwards!
Surprisingly little electronics
The main part of the housing is of course filled by the display and the battery. After you have removed these two parts, you gain access to the small PCB on which you will find surprisingly little electronics. Virtually all functions are contained in one large specialized chip! The focus button is mechanically coupled to the mechanism in the camera via the large hole in the top of the PCB. The round, black dial is the potentiometer with which you set the intensity of the LEDs. Between the large chip and this black dial is the connector for connecting the LED array around the lens. Below the potentiometer you see the housing for the memory card and the micro-USB connector.
There is a small push button between the two parts. That is the 'RESET', which you use to restart the electronics if the microcontroller should crash. That has never happened to us, by the way. On the side shown on the right you see the six push buttons to operate the device. The connector of the battery is located on the narrow bottom of the PCB. The board is connected to the display and to the camera module by means of two flat cables. The connectors for these cables can be seen on both sides of the PCB under the large round hole.
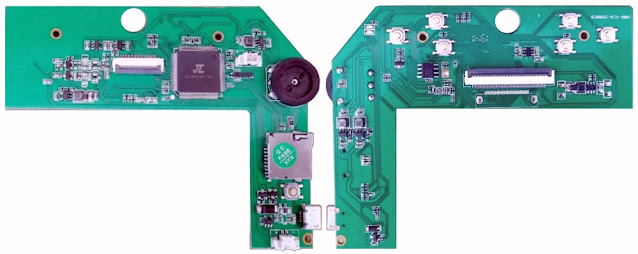 |
| The two sides of the small PCB. (© Pakequis, edit 2022 Jos Verstraten) |
Working with the G1200(D)
Switching on
You activate the microscope by pressing the leftmost push button for at least two seconds. Switch off the device in the same way.
Magnification and focus
The magnification is determined by the distance between the base and the lens. You set this distance with the two rotary knobs on either side of the column. The smaller this distance, the more the G1200(D) magnifies. Afterwards you have to focus with the large round button on the control panel.
The control panel
Around the large round focus button, you can see the six push buttons with which you can call up and operate all functions. The function of these buttons follows from the figure below.
 | |
| The function of the buttons. (© 2022 Jos Verstraten) |
- Resolution
Choose the resolution at which a video is created, selectable from 1080 (full high definition), 720P (widescreen HDTV), or VGA (640 × 480). - Cyclic record
The camera automatically takes a picture every three, five or ten minutes and writes it to the memory card. You can of course also disable that option. - High Dynamic Range
With this option, the microscope automatically enters video mode when motion is detected on the screen. However, this option did not work with our specimen. - Exposure
This option allows you to adjust the exposure time in seven steps between +3 and -3. - Data stamp
Whether or not to set the date and time on each recording.
 |
| The options of the first menu. (© 2022 Jos Verstraten) |
The second menu
- LCD Brightness
Dims the screen intensity after 30 seconds, one minute or two minutes. Pressing the 'ON/OFF' button reactivates the screen. You can of course also disable this option. - Auto Power Off
This option allows you to turn off the microscope automatically after three, five or ten minutes. - Frequency
Setting of the illumination for 50 Hz or 60 Hz networks. The purpose of this is not clear. - Auxiliary to the line
An option whose purpose has not become clear to us. - Language
Set the menu language to English, Spanish, Russian, Korean, Japanese, Thai, Hebrew, Portuguese, German, French, Italian, Turkish, Czech, Polish, Traditional Chinese or Simplified Chinese. - Date/Time
Set the date and time with the scroll buttons. - Format
If you have inserted a MicroSD flash card, you can format it or completely erase it with this option. - Default Setting
The factory settings are restored.
 |
| The options of the second menu. (© 2022 Jos Verstraten) |
The third menu
- Capture Mode
This mode allows you to set a delay of two, five or ten seconds between pressing the 'OK' button and taking a photo. This is ideal because when you press the button, the microscope vibrates for a few seconds and this prevents motion blur in the photo. - Resolution
Allows you to set the resolution of the photo in seven steps between 640 x 480 and 3648 x 2736 pixels. That corresponds to the more well-known quantity 1.3 ~ 2.0 ~ 5.0 ~ 8.0 ~ 10.0 ~ 12.0 megapixels. - Continuous shooting
With this option, the microscope takes three pictures after pressing the 'OK' button. - Quality
Determines the compression algorithm applied to reduce the size of the photos. The options are 'Fine', 'Normal' and 'Economy'. - Sharpness
Three sharpness settings, namely 'Strong', 'Normal' and 'Soft'. - Color
Again three selections, 'Normal', 'Black/White' and 'Sepia'. - ISO
Sets the sensitivity of the image to 'Auto', '100 ISO', '200 ISO' or '400 ISO'. - Exposure
Here you can adjust the exposure time in seven steps between +3 and -3.
 |
| The options of the third menu. (© 2022 Jos Verstraten) |
Working with the memory storage
Our experiences with the G1200(D)
 |
| The minimum magnification. (© 2022 Jos Verstraten) |
The maximum magnification
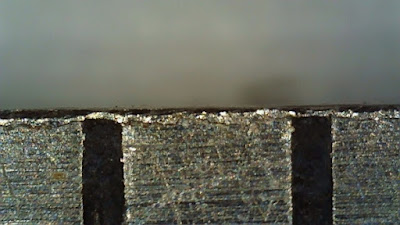 |
| The maximum magnification. (© 2022 Jos Verstraten) |
Exporting the image via USB
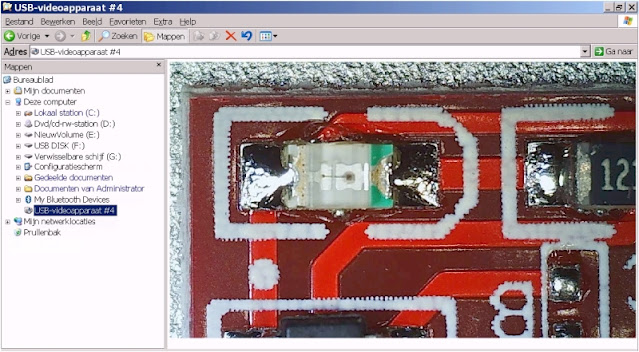 |
| The G1200(D) is automatically included in Windows 'Explorer' window. (© 2022 Jos Verstraten) |
The quality of the images
 |
| Photo, made without LED lighting, of a small PCB. (© 2022 Jos Verstraten) |
The image below shows an image of an approximately one millimeter large SMD resistor (0402 housing), made with both LED lighting at maximum intensity.
 |
| Photo of an SMD resistor with maximum LED illumination. (© 2022 Jos Verstraten) |
Our conclusion about the G1200(D) from Mustool
G1200D digital microscope
